


Get started learning to build your own electronics by following our FREE online courses below!
Learn More »
Categories
- animatronics (12)
- apple (11)
- arduino (179)
- art (41)
- articles (121)
- artificial intelligence (11)
- automation (421)
- avr (205)
- bitcoin (3)
- breadboard (9)
- cameras (57)
- cars (26)
- cell phones (28)
- clothing mods (21)
- console mods (26)
- dangerous (94)
- desktop mods (24)
- embedded (5)
- flying things (54)
- fpga (22)
- gaming creations (108)
- interface (225)
- internet (17)
- laptop mods (6)
- lasers (22)
- linux (7)
- magnetic (3)
- medical (12)
- microcontrollers (51)
- misc projects (152)
- msp (12)
- music (124)
- pic (90)
- projects (23)
- pyroedu (76)
- raspberry pi (26)
- robots (312)
- security (36)
- sensors (307)
- software (200)
- solar (19)
- stamp (9)
- tools (149)
- tutorials (98)
- Uncategorized (45)
- usb (44)
- wireless (256)
Sponsors
Build Like A Pyro!
Find many of the parts used on this site at our favorite online electronics shop

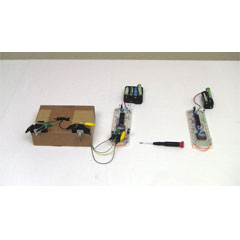
Wireless XBee Motor Control
Posted April 12, 2012 by Chris
“Standard DC motor control can be tricky enough if you are new to electronics, but how about wireless dual dc motor control? A while ago I introduced you to a simple dual dc motor control design that used the SN754410NE IC to control some off-the-shelf 3v or 6v motors. Let’s take a look beyond just motor control and see if we can’t make that same system wirelessly controlled.”
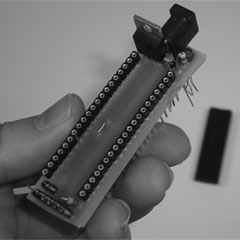
DIY Mini PIC Development Board
Posted April 5, 2012 by Chris
“Since I like to use the PIC microcontroller in my projects I figured it would be nice to make a mini development board that could fit onto a breadboard and already had a power circuit and programming circuit connected. This way I won’t have to rebuild the same power + programming circuit everytime I start a new project. This article describes my design process so that you can build one too!”
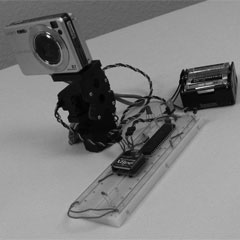
Wireless XBee Pan/Tilt With Servos
Posted March 30, 2012 by Chris
“In this article we will use a pair of XBee modules to build a quick wireless interface which will be used to wirelessly control a servo based pan and tilt system which can move my camera 45 degrees in any direction, left-right-forward-backwards. ”
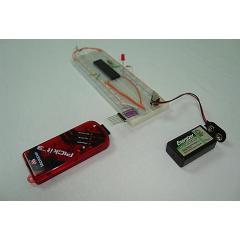
PIC Prototyping: MPLABX + PICKIT3 Intro
Posted March 22, 2012 by Chris
“The PICKit3 is microchip’s newest official PIC programmer and MPLABX is microchip’s newest IDE and while people argue about how good they are, the new programmer and IDE have never done me wrong. I upgraded away from the old ICD2 clone programmer that I had used for years when I saw that microchip sells their PICKit3 for under $50 and so now I’ll pass on my experience of how to use these tools to you guys!”

Using A Simple Tilt Sensor
Posted March 8, 2012 by Chris
“In this article we will build an example system and use the basic tilt sensor as an input into a microcontroller. The microcontroller will read the data input from the tilt sensor and act accordingly to output the current state of the tilt sensor. Everything will be done on a breadboard to show how easy it is to assemble and use the system.”
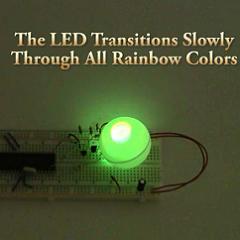
RGB LED Control via PIC
Posted February 9, 2012 by Chris
“A very popular type of LED that has finally come about is the tri-color, RGB LED. The RGB stands for: red, green and blue since the LED is capable of displaying all three colors, independently. This means that an RGB LED can display any color of the rainbow. This is a powerful capability, but it also requires more control. This tutorial explains how to display all the colors of the rainbow on a single RGB LED using a PIC 18F452 microcontroller.”

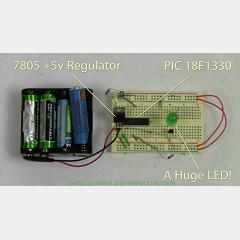
Fading LEDs via PWM
Posted January 19, 2012 by Chris
A very neat feature that PWM (pulse with modulation) offers is being able to control the brightness level of LEDs. By varying the duty cycle percentage, we can control the exact brightness of any LED. This article takes you through a simple example design step-by-step using a PIC microcontroller. The end result is an LED controller that can set an LED to 100 unique brightness levels.
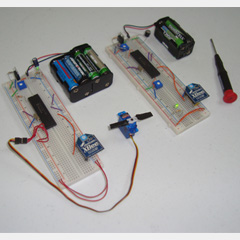
Xbee Wireless Servo Control
Posted December 22, 2011 by Chris
Today’s article shows you how to build a basic wireless input and output system in the form of a single transmitter and single receiver. Communication is one way to keep things simple with two xbee modules being used for the wireless link. In the end, a small trimpot will control the movement of a servo motor.
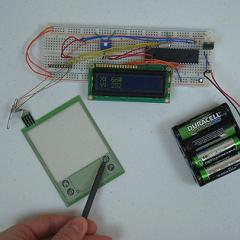
Simple Touch Screen Interface
Posted October 27, 2011 by Chris
Touch screens seem to be the must-have innovation of the decade as they’re seen in almost every new gadget and gizmo that comes out. But how exactly do they work and how can we use them? This PyroElectro article explains how a standard 4-wire resistive touch screen works and how to get the X/Y coordinates of a touched point using a PIC 18F452 microcontroller.
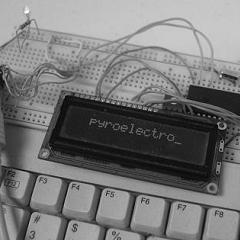
PS/2 Keyboard To 16×2 LCD
Posted September 29, 2011 by Chris
If you want to make a super simple I/O system that anyone can use, the ps/2 keyboard and a standard 16×2 LCD is all you need. This article explains how to display input from a PS/2 keyboard on a 16×2 lcd with a few example ‘commands’ like backspace and delete. PS/2 and 16×2 LCD theory is explained, the hardware schematic is included and the software available in the article.
Currently Hot
DIY Mini PIC Development Board
build your own quick, easy and awesome pic dev board
Wireless XBee Pan/Tilt With Servos
build a wireless pan/tilt system for your camera
PIC Prototyping: MPLABX + PICKIT3 Intro
learn how to use mplabx with the new pickit3
FPGA to 16×2 LCD Interface (HD44780)
build a cpld to 16x2 lcd interface to display output
Using A Simple Tilt Sensor
learn how the most basic of tilt sensors works
Animatronics

Recent Articles
Arduino DDS Shield
build your own arduino based analog signal generator
A Digital Multimeter In Review (Tenma 72-7735)
learn about your typical digital multimeter in review
The PIC Annoy PCB
build something to annoy your co-workers
Automate Your Life With Cron
learn how to use cron for computer automation
Web Scraping For Weather Updates
learn how to use php to scrape the web
Creating A Web Server In Linux
learn how to make a lamp web server in linux
Stepper Motor Control With A stepRocker TMCM-1110
learn how a commercial stepper motor controller works
Arduino To PIC Wireless Proximity Motor Control
control a motor with a distance sensor wirelessly
PIC to Arduino Wireless Communication via XBee
use xbee to make a pic wirelessly talk to an arduino
Motor Control via Infrared Distance Sensor
control a motor simply by waving your hand

