


Get started learning to build your own electronics by following our FREE online courses below!
Learn More »
Categories
- animatronics (12)
- apple (11)
- arduino (179)
- art (41)
- articles (121)
- artificial intelligence (11)
- automation (421)
- avr (205)
- bitcoin (3)
- breadboard (9)
- cameras (57)
- cars (26)
- cell phones (28)
- clothing mods (21)
- console mods (26)
- dangerous (94)
- desktop mods (24)
- embedded (5)
- flying things (54)
- fpga (22)
- gaming creations (108)
- interface (225)
- internet (17)
- laptop mods (6)
- lasers (22)
- linux (7)
- magnetic (3)
- medical (12)
- microcontrollers (51)
- misc projects (152)
- msp (12)
- music (124)
- pic (90)
- projects (23)
- pyroedu (76)
- raspberry pi (26)
- robots (312)
- security (36)
- sensors (307)
- software (200)
- solar (19)
- stamp (9)
- tools (149)
- tutorials (98)
- Uncategorized (45)
- usb (44)
- wireless (256)
Sponsors
Build Like A Pyro!
Find many of the parts used on this site at our favorite online electronics shop

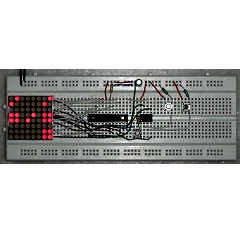
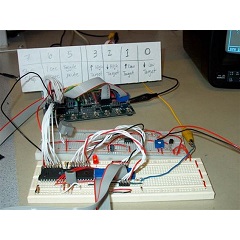
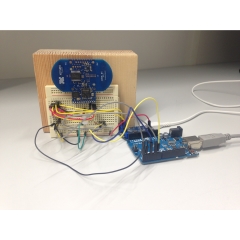
Digital Tic-Tac-Toe Using ATtiny85
Posted October 30, 2015 by Chris
"This project is an attempt to recreate the classic game in a digital format. To spice things up a bit, instead of using the regular 2 player setup it uses an inbuilt AI mechanism to compete against the player."

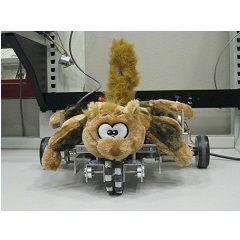
The Witch From The Well
Posted October 27, 2015 by Chris
"Every haunted well needs a trained demon-summoning witch. Our haunted well has just the thing. A witch standing nearby, outfitted with the latest electronics. She’s sporting a uMP3 MP3 playing card, plus a Scary-Terry audio servo driver tied to her skull-head. And of course she’s also customized with a pair of (diffused) green LED eyes that will also flash as she speaks."
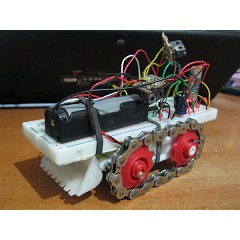
Robotic Pet Project
Posted October 26, 2015 by Chris
"The Robotic Pet is an automated robot that can mimic common pets behaviours, like entertaining with a ball autonomously and interacting with human gesture freely. As the final project of EE 125 Introduction to Robotics class, the robotic pet is built on the UC Berkeley TETRIX robot platform."
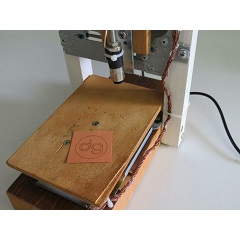
38mm x 38mm Laser Engraver Build Using CD-RW on ATmega328p
Posted October 24, 2015 by Chris
"To build this tool I’ve used two old CD-ROM writer that lays around in my garage.
The X/Y positioning system it is build using the CD-ROM motor assembly. For the engraving laser i use the CD-ROM writer laser. With this hardware the engraving area are will be almost 38mm x 38mm."
Build A 3D Printable Toy Platform
Posted October 21, 2015 by Chris
"The modular robot or toy platform is essentially built off of a chassis that enables the user to add any number of 3D printed toy housings to it ranging from the aforementioned bulldozer, tank, digger toy or anything else that a user wants to program it as using the code that was generously provided by hobbyman."
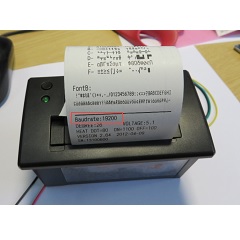
Tutorial: Thermal Printer Hardware Setup
Posted October 18, 2015 by Chris
" It would be great if I could print out the time and ranking directly, so if there is no PC, the system can be small and tiny. So here is my next project and tutorial: Printing with the Freedom board!"
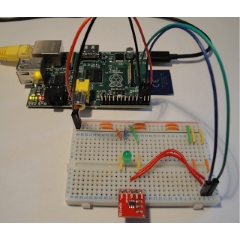
Raspberry PI Digital to Analogue Conversion (DAC)
Posted October 13, 2015 by Chris
"In this tutorial I will be detailing how to generate analogue voltages using a Raspberry Pi and an external Digital to Analogue Converter (DAC) to control the brightness of an LED. Although the Raspberry Pi can interface with various low-level hardware using it’s GPIO lines, SPI, I2C and serial UART interface, it does not have an DAC interface for generating analogue voltage levels. Instead the user must use an external DAC device controlled by one of the available low-level hardware interfaces, such as SPI and I2C."
Digital Stethoscope With Display
Posted October 11, 2015 by Chris
"At the highest level, the design of our project centers around an acquisition circuit, data processing in two MCUs, and the output on a TV screen. The first part of the stethoscope is the acquisition unit, which consists of an actual stethoscope mated with a microphone, and an amplifier circuit. The microphone captures the audible signal from the body that is acoustically amplified by the stethoscope."
DIY Temperature And Humidity Wireless Data Logger
Posted October 10, 2015 by Chris
"I will not go into details on how to control humidity. Instead I’ll describe what motivated me to design and create my own temperature and humidity sensor which reports its readings every minute to a central Linux server."
Arduino Radar Tutorial: Fading an LED With My Breath
Posted October 7, 2015 by Chris
"I built this Arduino radar project, where I control the brightness of an LED with my breath. In this tutorial, I will show you exactly how to do it. It was an experiment to get the XeThru radar to work with Arduino. I plan to expand on this later, and build more useful applications. And I will share with you how to connect the hardware, and how to create the Arduino code."
Currently Hot
Programming the eBOX
create & download an os image to the eBOX-II
The Altera DE2 Board
a simple introduction for setting up the DE2 board
The eBOX-II Embedded PC
learn the in's and out's of the eBOX-II
Stepper Motor Control
control a stepper motor using an LMD18245
PIC Prototyping Basics
build your own pic prototype development board
Animatronics

Recent Articles
Arduino DDS Shield
build your own arduino based analog signal generator
A Digital Multimeter In Review (Tenma 72-7735)
learn about your typical digital multimeter in review
The PIC Annoy PCB
build something to annoy your co-workers
Automate Your Life With Cron
learn how to use cron for computer automation
Web Scraping For Weather Updates
learn how to use php to scrape the web
Creating A Web Server In Linux
learn how to make a lamp web server in linux
Stepper Motor Control With A stepRocker TMCM-1110
learn how a commercial stepper motor controller works
Arduino To PIC Wireless Proximity Motor Control
control a motor with a distance sensor wirelessly
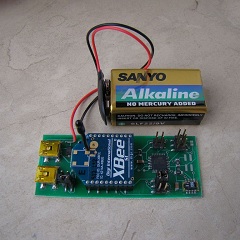
PIC to Arduino Wireless Communication via XBee
use xbee to make a pic wirelessly talk to an arduino
Motor Control via Infrared Distance Sensor
control a motor simply by waving your hand

