Program The Altera DE2 Board
After all that hard work, it's time to get the program onto the DE board so we can play around with it. There's two methods of programming the board that we have at our disposal. There is the JTAG method and what is called the Active Serial Programming method. The JTAG method is good for temporary testing and the active serial programming for long term debugging. We'll go with the JTAG method so that we don't overwrite the current program on the FPGA.
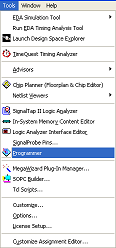
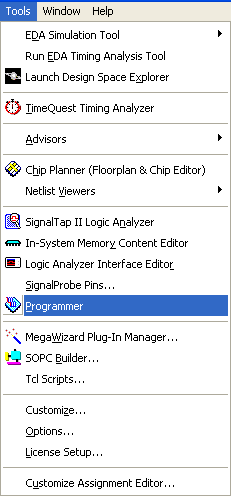
Go: Tools -> Programmer »
Make sure your board is pluged in and turned on.
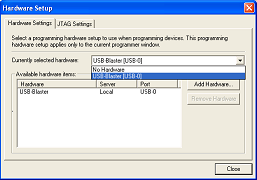
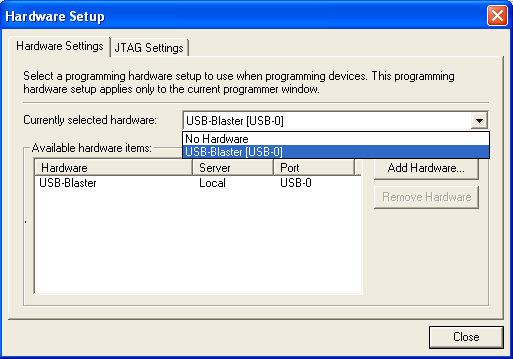
Select the USB-Blaster for the programmer that we'll be using »
On the left hand side of the board, move the switch up to the 'Run' position.
Make sure you're in JTAG mode, highlight your project & then click Start »
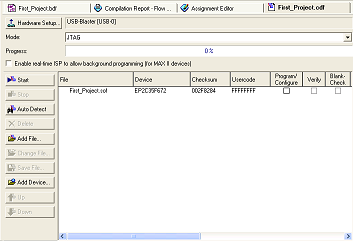
Programming should take only a matter of seconds »

It's programmed, ready to go & already running. Let's test it out and see if our program does what it should on the board.
After all that hard work, it's time to get the program onto the DE board so we can play around with it. There's two methods of programming the board that we have at our disposal. There is the JTAG method and what is called the Active Serial Programming method. The JTAG method is good for temporary testing and the active serial programming for long term debugging. We'll go with the JTAG method so that we don't overwrite the current program on the FPGA.
Go: Tools -> Programmer »
Make sure your board is pluged in and turned on.
Select the USB-Blaster for the programmer that we'll be using »
On the left hand side of the board, move the switch up to the 'Run' position.
Make sure you're in JTAG mode, highlight your project & then click Start »
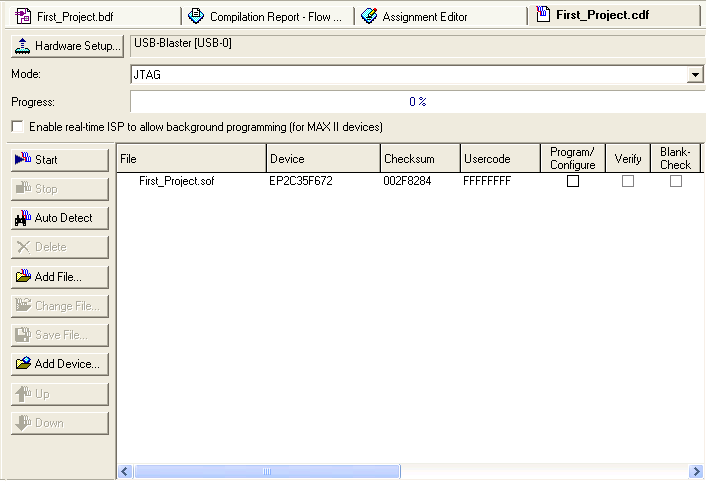
Programming should take only a matter of seconds »
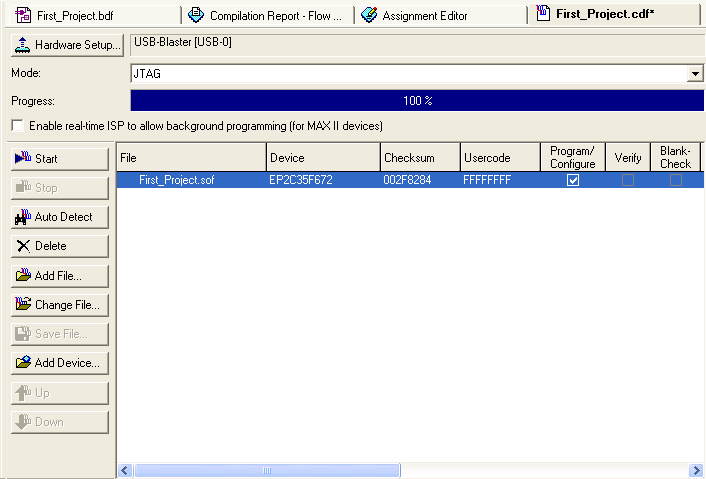
It's programmed, ready to go & already running. Let's test it out and see if our program does what it should on the board.