Project Info
Author: Chris
Difficulty: Medium
Time Invested: 6 Hours
Prerequisites:
Take a look at the above
articles before continuing
to read this article.
Author: Chris
Difficulty: Medium
Time Invested: 6 Hours
Prerequisites:
Take a look at the above
articles before continuing
to read this article.
In this article, we will show you how to build a system where the input and output have seperate microcontrollers and are linked together using XBee modules. The input system will use an infrared distance sensor to measure how far away an object is from the sensor and the output will drive a standard DC motor using a power transistor.
Purpose & Overview Of This Project
The purpose of this project is to create a transmitter system that takes input from a sensor and passes it to a receiver system that produces some correlated output. The input will come from an IR distance sensor and output will go to a motor control circuit, driving a +3v motor. When the IR distance sensor, senses an object is a certain distance away from it, that will be passed to the motor controller, telling the motor to drive at a certain speed. The closer an object is to the sensor, the faster the motor will move.
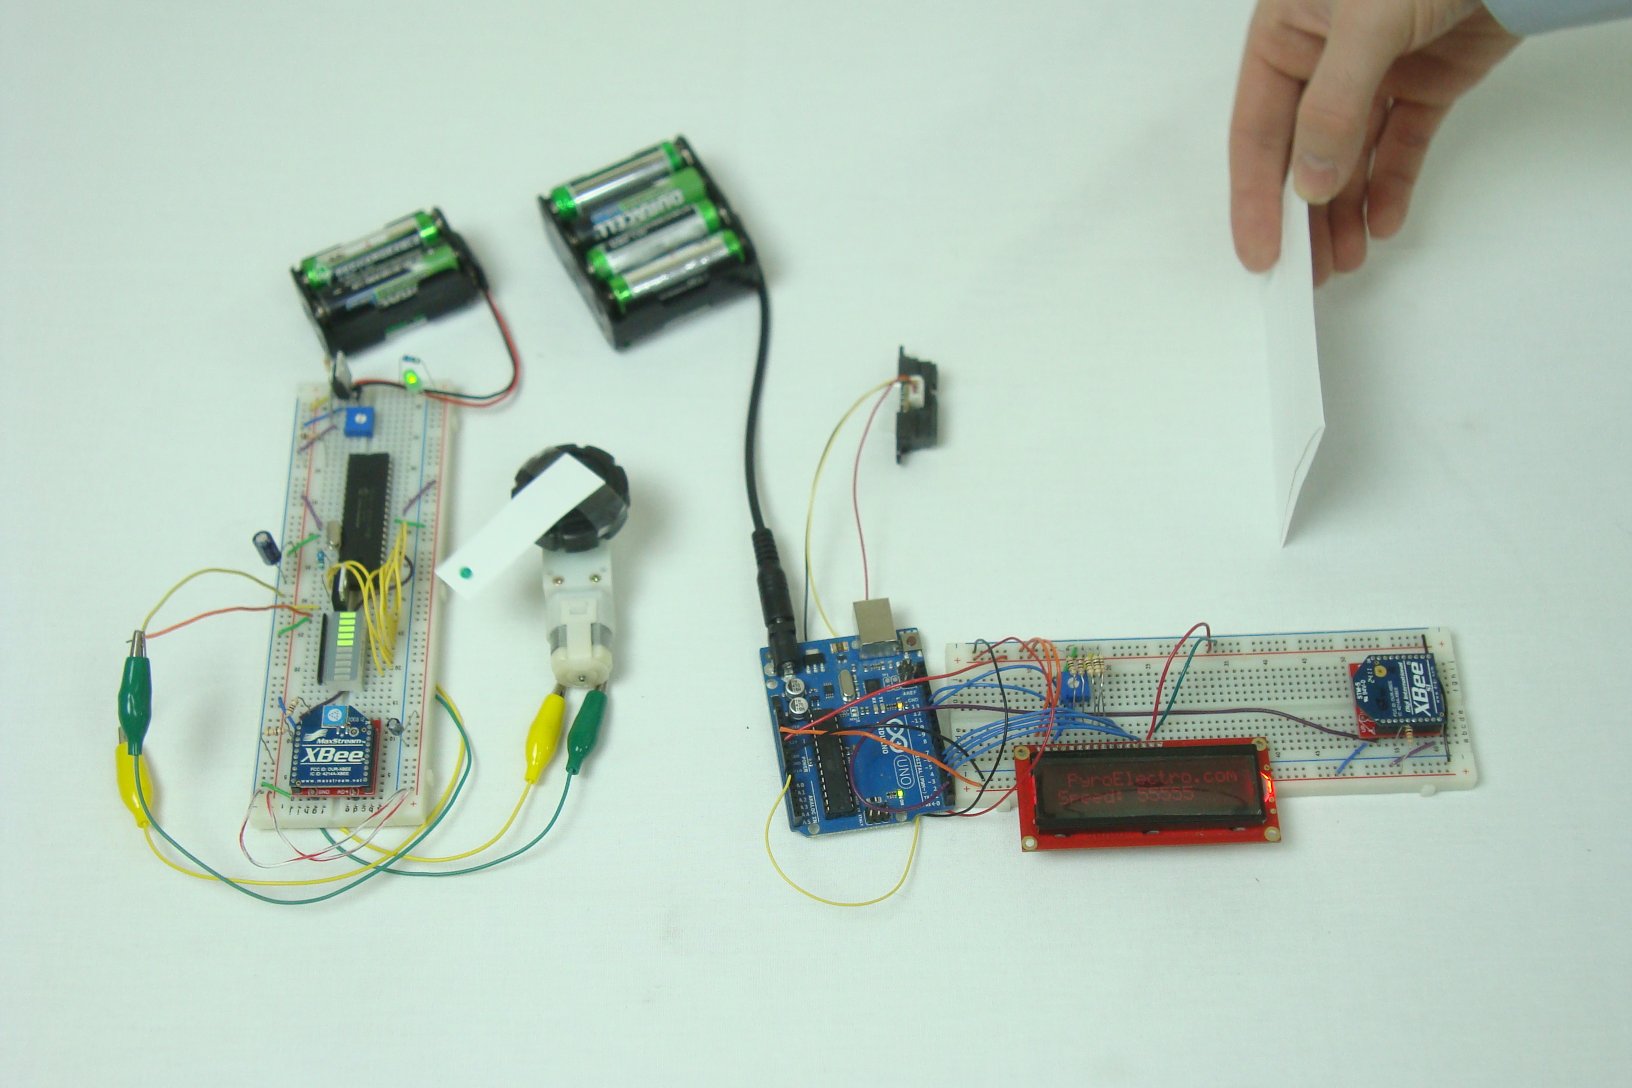
We will need a fair amount of parts in order to build this system. The transmitter will be an Arduino UNO, with a sharp IR sensor, 16x2 LCD and XBee wireless module connected to it. The receive will be a PIC 18LF4520 with an LED Bar, TIP42, +3v motor and XBee wireless module connected to it. When everything is connected together, moving your hand back and forth infront of the sensor should vary the speed of the motor!