Hardware Design
The construction portion of this tutorial is only assembling the schematic together on a breadboard. Below I have described a few of the steps required while building the circuit with pictures to show how I did it. This is not a very complex circuit and shouldn't take longer than about 30 minutes to assemble.
Building The Circuit
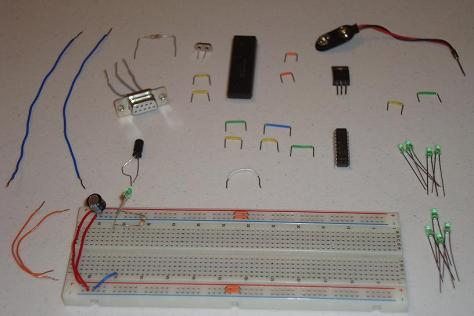
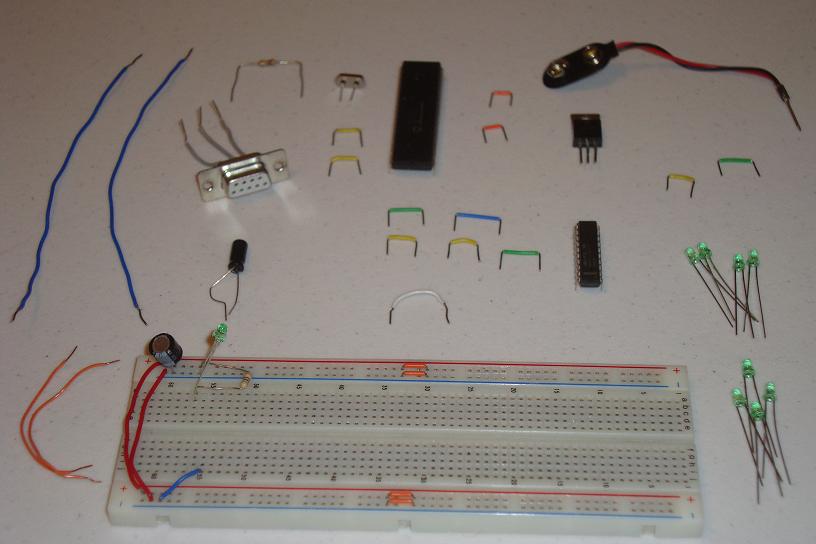
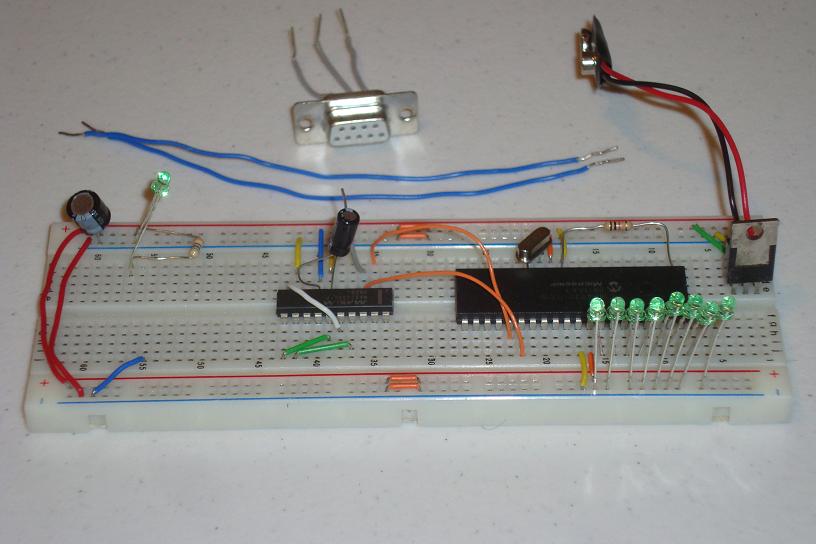
Get your parts together and follow the schematic. I build mine and in stages as you can see below...
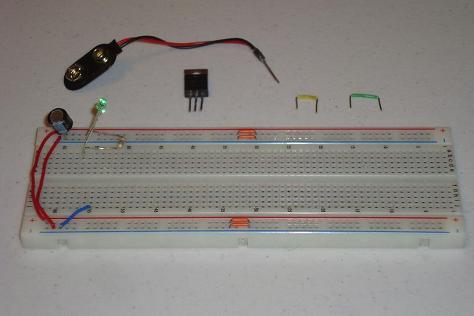
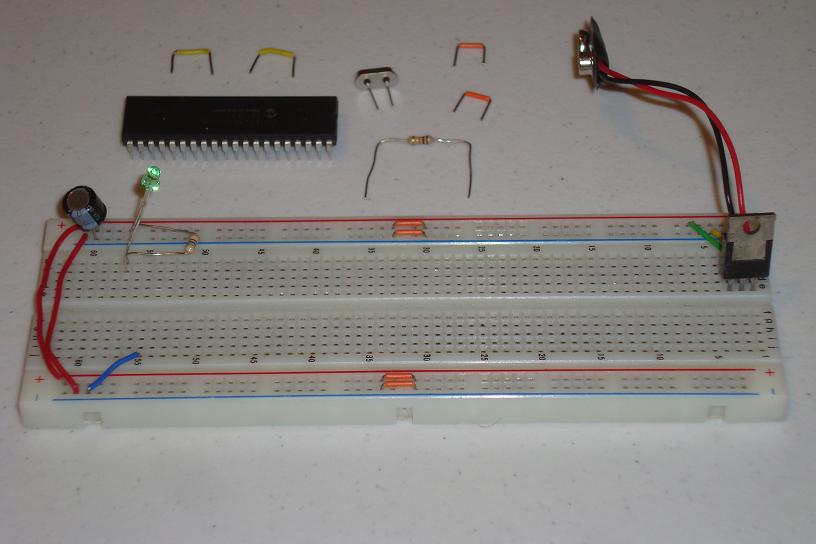
·First assemble the power circuit with the 7805 +5v regulator.
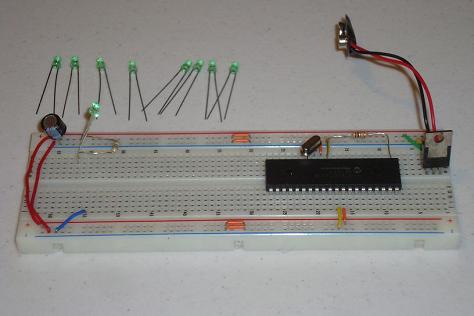
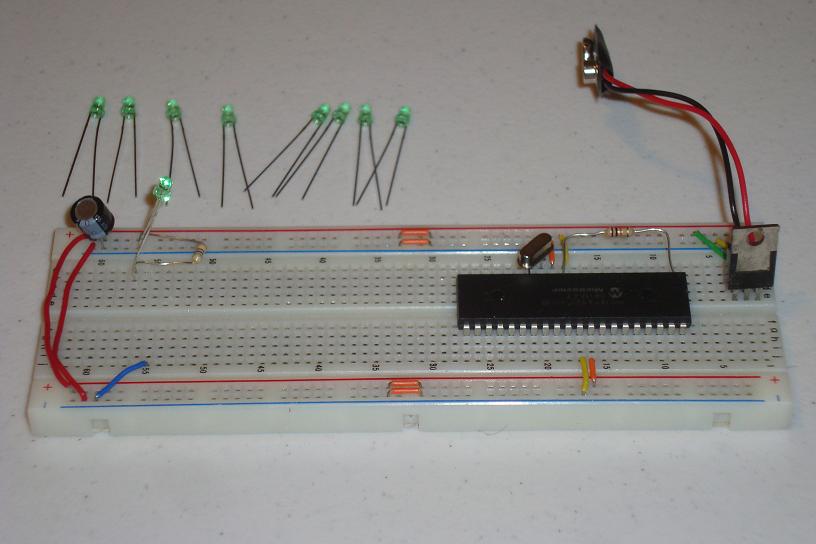
·Next wire up the PIC with power, ground and 16 MHz crystal.

·Add The 8 LEDs connected to PORTB. Current limiting resistors optional (I didn't put any).
·Now Connect The MAX233A chip to power, ground and the PIC.

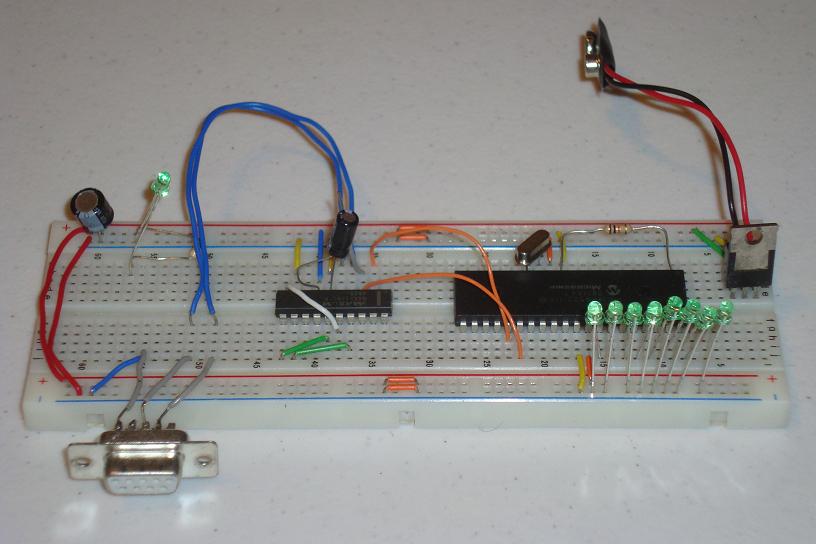
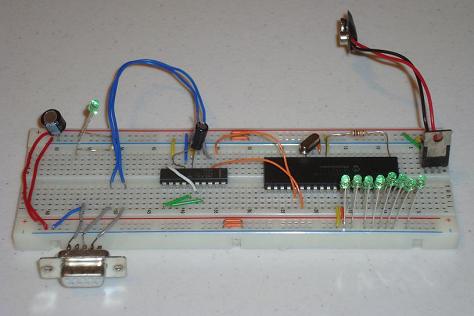
·Finally, add the RS232 connector and wire it to the MAX233A and ground.

·That's it, the hardware portion of the RS232 Interface is complete.
The construction portion of this tutorial is only assembling the schematic together on a breadboard. Below I have described a few of the steps required while building the circuit with pictures to show how I did it. This is not a very complex circuit and shouldn't take longer than about 30 minutes to assemble.
Building The Circuit
Get your parts together and follow the schematic. I build mine and in stages as you can see below...
·First assemble the power circuit with the 7805 +5v regulator.

·Next wire up the PIC with power, ground and 16 MHz crystal.
·Add The 8 LEDs connected to PORTB. Current limiting resistors optional (I didn't put any).
·Now Connect The MAX233A chip to power, ground and the PIC.

·Finally, add the RS232 connector and wire it to the MAX233A and ground.
·That's it, the hardware portion of the RS232 Interface is complete.