An Overview Of The ByteBlasterMV FPGA Programmer
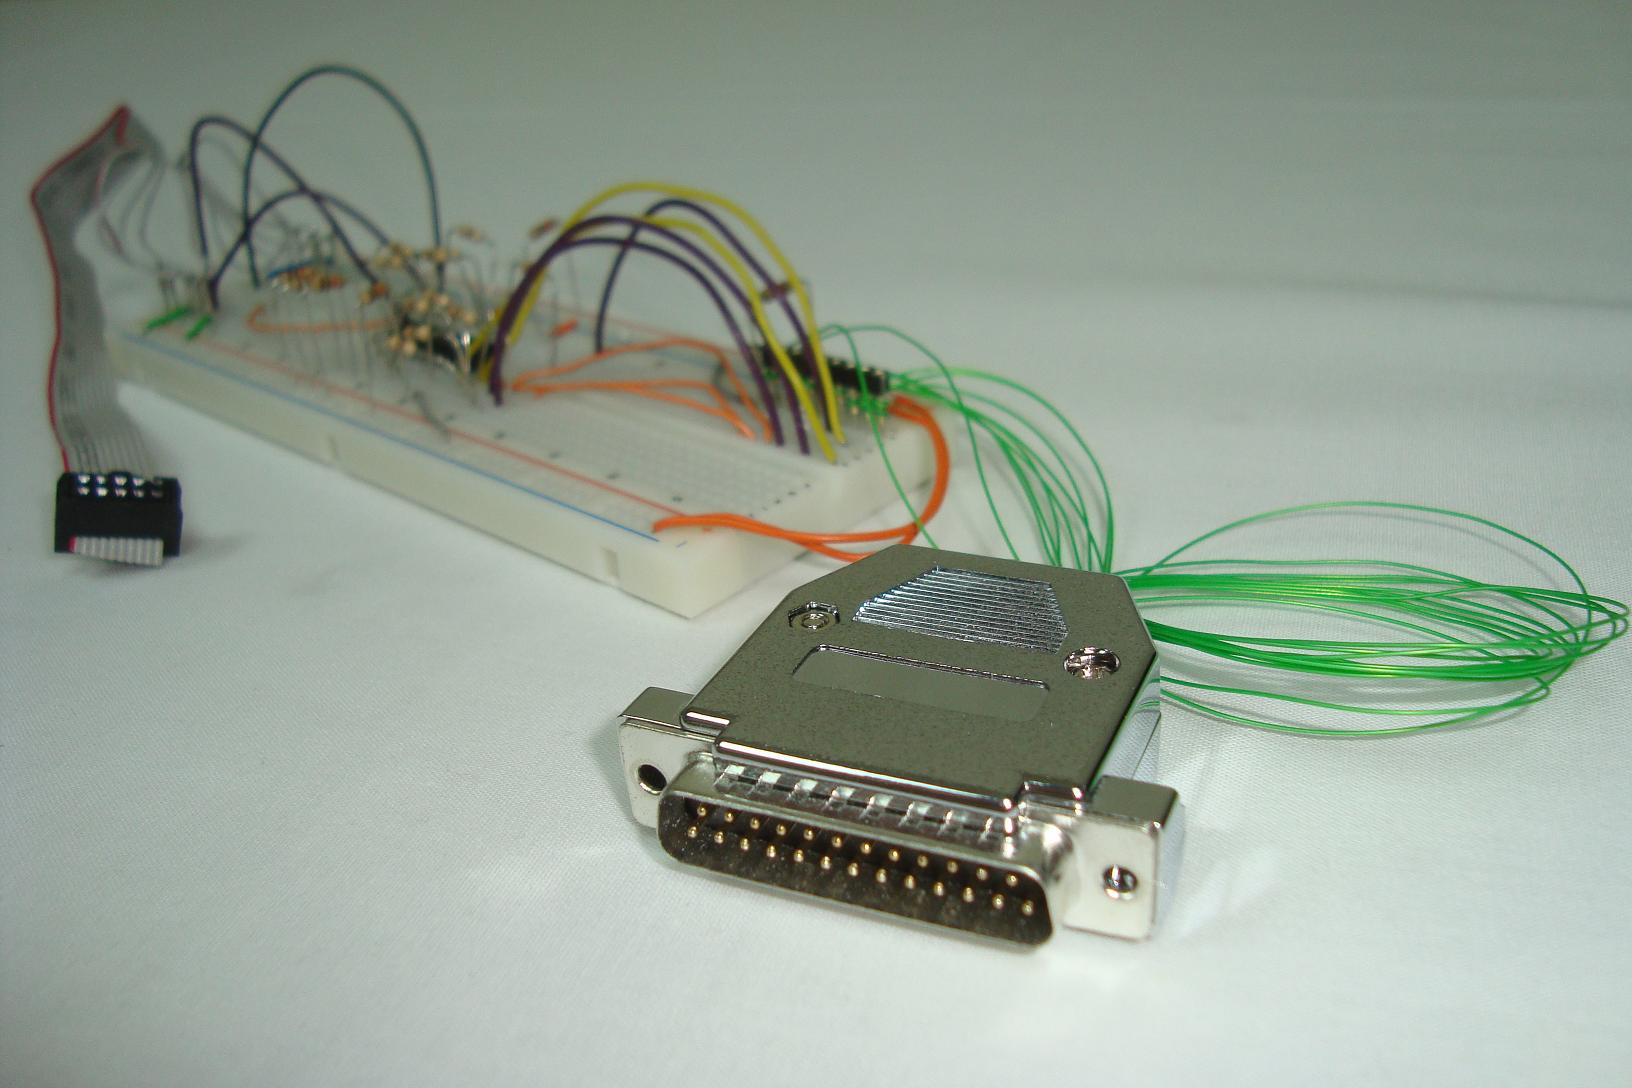
With any luck assembling the circuit didn't take you very long and most of your time was eaten up soldering individual wires to the 25 DB parallel port connector. What's neat about this project is how you really can save a lot of money by simply using your hands and some smart thinking. The breadboard ByteBlasterMV worked, the laptop even recognized it as the BBMV and so from start to finish we now know exactly how to built a simple FPGA/CPLD programmer for Altera devices.

What To Do Now
One thing I'm sure you've noticed is how fragile and delicate the circuit is since it is on a breadboard. Yes, if two resistors accidentally touch, then the circuit will probably stop working. This is less than ideal for a programmer and a logical next step would be to build your own PCB and solder the parts down. Or to send it out to be built and assembled profesionally. Both of those options indeed presume that you are willing to spend more than $10 to build a ByteBlasterMV, but for those of you (like me) who are super cheap, the breadboard version will always work!
Conclusion
This article was meant to help out anyone who is interested in FPGA/CPLD but can't actually afford the super expensive programmers. Building your own programmer gives an advantage that you know exactly what is going on and how it should work, compared to a canned solution that is basically a black box. Even though this solution of using the parallel port is a bit antiquated, it still works perfectly as needed.
If you have any further questions, I implore you...don't be shy, take a look at the forums or ask a question there. I check them out regularly and love getting comments & questions.
With any luck assembling the circuit didn't take you very long and most of your time was eaten up soldering individual wires to the 25 DB parallel port connector. What's neat about this project is how you really can save a lot of money by simply using your hands and some smart thinking. The breadboard ByteBlasterMV worked, the laptop even recognized it as the BBMV and so from start to finish we now know exactly how to built a simple FPGA/CPLD programmer for Altera devices.
What To Do Now
One thing I'm sure you've noticed is how fragile and delicate the circuit is since it is on a breadboard. Yes, if two resistors accidentally touch, then the circuit will probably stop working. This is less than ideal for a programmer and a logical next step would be to build your own PCB and solder the parts down. Or to send it out to be built and assembled profesionally. Both of those options indeed presume that you are willing to spend more than $10 to build a ByteBlasterMV, but for those of you (like me) who are super cheap, the breadboard version will always work!
Conclusion
This article was meant to help out anyone who is interested in FPGA/CPLD but can't actually afford the super expensive programmers. Building your own programmer gives an advantage that you know exactly what is going on and how it should work, compared to a canned solution that is basically a black box. Even though this solution of using the parallel port is a bit antiquated, it still works perfectly as needed.
If you have any further questions, I implore you...don't be shy, take a look at the forums or ask a question there. I check them out regularly and love getting comments & questions.