Project Info
Author: Chris
Difficulty: Easy
Time Invested: 1 Hours
Prerequisites:
Take a look at the above
tutorials before continuing
to read this project.
Author: Chris
Difficulty: Easy
Time Invested: 1 Hours
Prerequisites:
Take a look at the above
tutorials before continuing
to read this project.
This tutorial will cover:
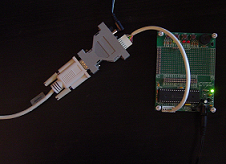
1. Connecting the Hardware.
2. Connecting the PIC to a Host.
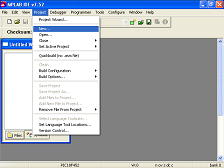
3. Compiling a Program.
4. Programming the PIC.
Once again, this tutorial is setup & written for the first timer, so don't worry about not understanding something. There are alot of guiding pictures & videos.
The Hardware Setup
Purpose of this project
As a beginner with embedded systems I encountered few support sites to help me along the way and that is the main reason this tutorial exists. Starting with such a broad topic and little support is terribly difficult for such a simple device like the PIC.
The goal of this project is to thoroughly explain and complete the process of programming a PIC Microcontroller. Once this is achieved you can use the PIC Microcontroller to its full potential. You can basically make this small computer do your bidding!
The C18 Compiler Suite is used because it is provided for free from Microchip and it offers a much easier method of programming the PIC with the more familiar C syntax.