Drilling, Soldering and Completing the PCB
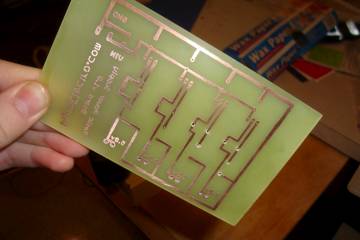
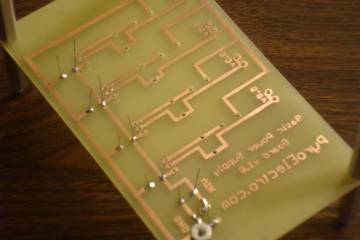
The PCB is a blank slate with only the copper circuit that we devised. Since all the parts are through-hole parts holes need to be drilled so that the parts can be soldered to the board.

Depending on the type of SIPs you are using I would recommend using either a 1/16 inch bit with your power drill or a 1/8 inch bit. For my board the holes for the LM317 are 1/16 inch and the holes for the SIPs are 1/8 inch.
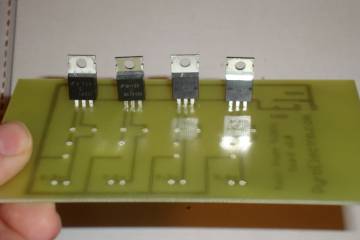
After all the holes are drilled I test out how some of the components fit into the board. They all fit well into the holes, so no changes are needed. Now the parts can all be soldered into the board.
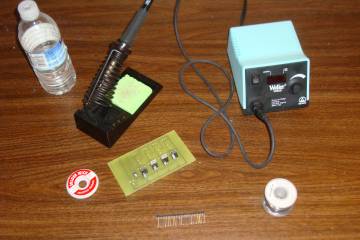
These are the tools used to solder everything to the PCB board, a nice soldering iron, some solder and desolder, all the components for the board and some water to wet the sponge for the soldering iron.
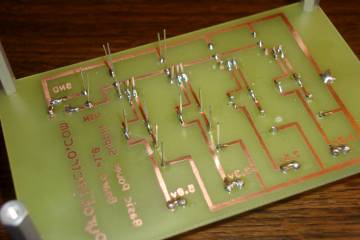
The first parts solder in with no problems, as should all the rest. Just make sure you solder to the copper traces and things should go smoothly.
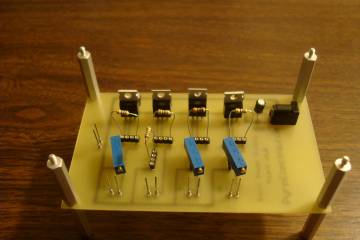
With everything soldered I plan out which resistors will go where. The leads are all very long and need to be trimmed up a little bit.
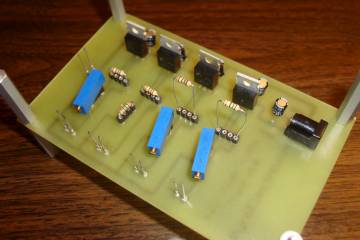
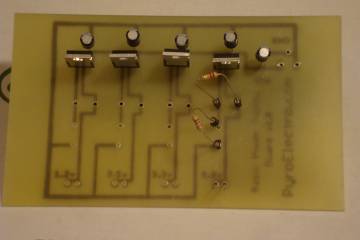
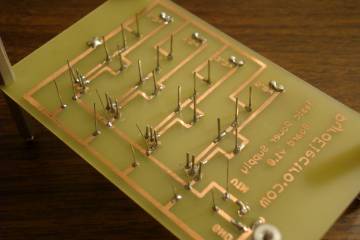
After trimming some leads on half the board you can see how it makes things look a lot better and safer. I trimmed the rest of the leads which brings the final product:

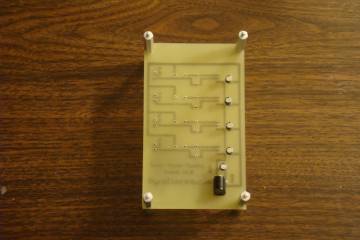
This is the final PCB board. The variable resistors will need to be set to the right resistance, but other than that the board is finished.
The PCB is a blank slate with only the copper circuit that we devised. Since all the parts are through-hole parts holes need to be drilled so that the parts can be soldered to the board.
Depending on the type of SIPs you are using I would recommend using either a 1/16 inch bit with your power drill or a 1/8 inch bit. For my board the holes for the LM317 are 1/16 inch and the holes for the SIPs are 1/8 inch.
After all the holes are drilled I test out how some of the components fit into the board. They all fit well into the holes, so no changes are needed. Now the parts can all be soldered into the board.
These are the tools used to solder everything to the PCB board, a nice soldering iron, some solder and desolder, all the components for the board and some water to wet the sponge for the soldering iron.
The first parts solder in with no problems, as should all the rest. Just make sure you solder to the copper traces and things should go smoothly.
With everything soldered I plan out which resistors will go where. The leads are all very long and need to be trimmed up a little bit.
After trimming some leads on half the board you can see how it makes things look a lot better and safer. I trimmed the rest of the leads which brings the final product:
This is the final PCB board. The variable resistors will need to be set to the right resistance, but other than that the board is finished.