Etching The Circuit On The PCB
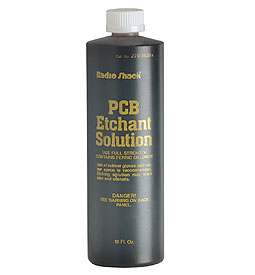
Now that the PCB is ready to be etched, we'll need to prepare the etching solution and our etching setup. The etching solution I will use is Ferric Chloride.

Ferric Chloride is very acidic and can cause harm to humans. Wear gloves and eye protection when handling this acid. You should also work in a well ventilated area.


I like to use two plastic containers. The smaller plastic container will have a mixture of 75% acid and 25% hot water. The warm-hot water will accelerate the time it takes to etch. In the larger plastic container I put 100% warm water. This will keep the smaller container's solution warm as well.
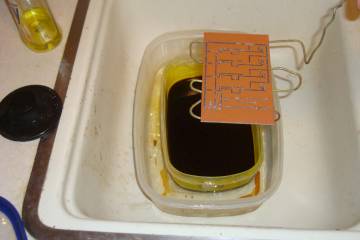
Using an old hanger, I bent a makeshift holder for the PCB board. With it I'm able to put the board into the solution without risking it getting on my skin. It also allows me to move and shake the board while in the solution which speeds up the etching process.
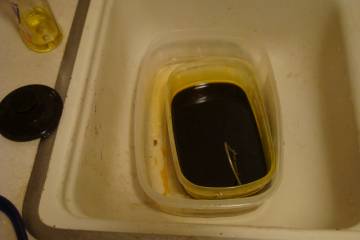
Slowly but surely the board will etch, usually from the outside inward. Shake the board in the solution every few minutes. The total etching time should be no more than 1 hour, but it really depends on many factors so don't be surprised if yours etches quicker or slower.
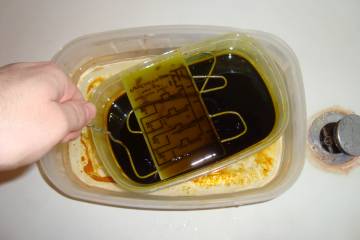
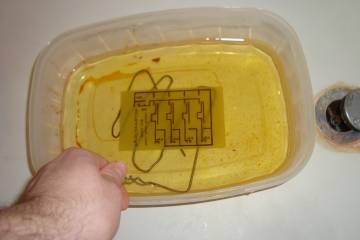
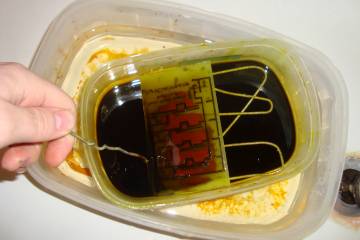
Once the board is done etching and you cannot see any more copper left on the board remove the PCB from the smaller container filled with the ferric chloride. Rinse off the board, I usually put it in the larger container filled with warm water and move it about for a little while.

Once the board is washed off, use a sponge or nylon pad to rub off the ink. Only the copper traces should be visible.
This is a quick video of me rubbing off some of the toner ink from the freshly etched PCB board. Notice that it takes take some effort to get the toner off.
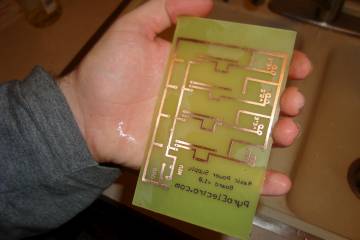
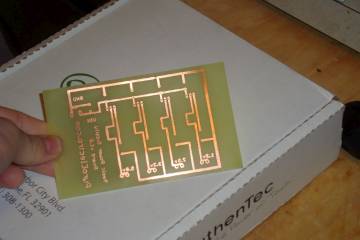
At this point the circuit has been successfully transferred and we have a PCB. Now we only need to drill some holes for all of our through-hole parts and solder them in. Almost done!
Now that the PCB is ready to be etched, we'll need to prepare the etching solution and our etching setup. The etching solution I will use is Ferric Chloride.
Ferric Chloride is very acidic and can cause harm to humans. Wear gloves and eye protection when handling this acid. You should also work in a well ventilated area.
I like to use two plastic containers. The smaller plastic container will have a mixture of 75% acid and 25% hot water. The warm-hot water will accelerate the time it takes to etch. In the larger plastic container I put 100% warm water. This will keep the smaller container's solution warm as well.
Using an old hanger, I bent a makeshift holder for the PCB board. With it I'm able to put the board into the solution without risking it getting on my skin. It also allows me to move and shake the board while in the solution which speeds up the etching process.
Slowly but surely the board will etch, usually from the outside inward. Shake the board in the solution every few minutes. The total etching time should be no more than 1 hour, but it really depends on many factors so don't be surprised if yours etches quicker or slower.
Once the board is done etching and you cannot see any more copper left on the board remove the PCB from the smaller container filled with the ferric chloride. Rinse off the board, I usually put it in the larger container filled with warm water and move it about for a little while.
Once the board is washed off, use a sponge or nylon pad to rub off the ink. Only the copper traces should be visible.
This is a quick video of me rubbing off some of the toner ink from the freshly etched PCB board. Notice that it takes take some effort to get the toner off.
At this point the circuit has been successfully transferred and we have a PCB. Now we only need to drill some holes for all of our through-hole parts and solder them in. Almost done!