An Overview Of Homemade PCB (Etching)
The toner-transfer process and etching of PCBs at home is a relatively easy and straight-forward process. The key to a successful PCB is making sure the toner transfers cleanly to the PCB, so use a high heat iron. As for the etching itsself, you just watch...piece of cake, right? The drilling and soldering is probably the only part that requires any real effort on your part, so do it correctly and you'll be rewarded with a high quality PCB.
What To Do Now
Once you know how to make a 1-layer PCB board, a world of opportunity opens up to you. No more need to breadboard or wirewrap. No more dirty looking newbie electronics! While I honestly prefer the newbie looking prototype of electronics the PCB has a much more professional look, so use that to your advantage. 2-layer PCB's can also be done at home, you just have to do the toner transfer process twice, once on each side. Homemade 2-layer PCB's are a bit more of a challenge but definitely do-able.
Conclusion
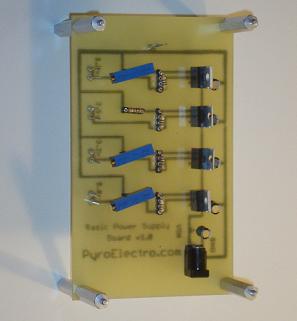
This tutorial was successful in reaching the goals outlined in the introduction. It works as it should and looks pretty (at least to me). The design is not the best in the world, but I just needed something to supply a stable voltage for low currents. Don't get frustrated if you make a bad design on your PCB, remember someone always has a better design than you...you just need one that works, right?
If you have any further questions, I implore you...don't be shy, take a look at the forums or ask a question there. I check them out regularly and love getting comments & questions.
The toner-transfer process and etching of PCBs at home is a relatively easy and straight-forward process. The key to a successful PCB is making sure the toner transfers cleanly to the PCB, so use a high heat iron. As for the etching itsself, you just watch...piece of cake, right? The drilling and soldering is probably the only part that requires any real effort on your part, so do it correctly and you'll be rewarded with a high quality PCB.
What To Do Now
Once you know how to make a 1-layer PCB board, a world of opportunity opens up to you. No more need to breadboard or wirewrap. No more dirty looking newbie electronics! While I honestly prefer the newbie looking prototype of electronics the PCB has a much more professional look, so use that to your advantage. 2-layer PCB's can also be done at home, you just have to do the toner transfer process twice, once on each side. Homemade 2-layer PCB's are a bit more of a challenge but definitely do-able.
Conclusion
This tutorial was successful in reaching the goals outlined in the introduction. It works as it should and looks pretty (at least to me). The design is not the best in the world, but I just needed something to supply a stable voltage for low currents. Don't get frustrated if you make a bad design on your PCB, remember someone always has a better design than you...you just need one that works, right?
If you have any further questions, I implore you...don't be shy, take a look at the forums or ask a question there. I check them out regularly and love getting comments & questions.