The Schematic
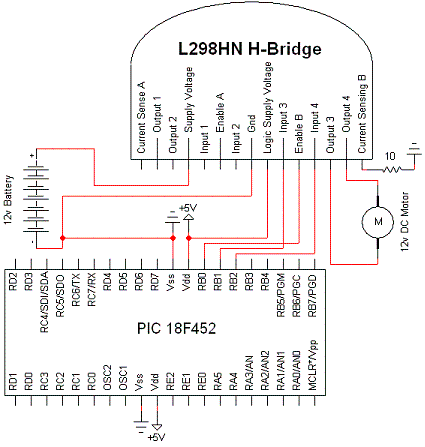
The schematic seen below uses all the hardware components we've seen up to this point. If you're following along with this tutorial be sure to follow it exactly as seen below. higher.

View Full Schematic
Components are labeled to the best of my ability. Parts hooked up to the PIC are minial and it should be recognized that this experiment actually uses the Olimex P-40 Development board and not a bare bones PIC layout as seen in the schematic. However if you choose to follow the schematic exactly it will work the same as it would with the development board, provided of course that the software is preprogrammed onto the PIC.
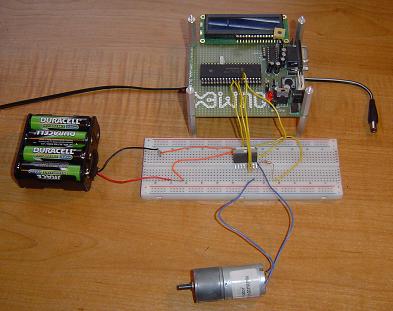
What The Setup Looks Like

View Full Picture
The schematic seen below uses all the hardware components we've seen up to this point. If you're following along with this tutorial be sure to follow it exactly as seen below. higher.

View Full Schematic
Components are labeled to the best of my ability. Parts hooked up to the PIC are minial and it should be recognized that this experiment actually uses the Olimex P-40 Development board and not a bare bones PIC layout as seen in the schematic. However if you choose to follow the schematic exactly it will work the same as it would with the development board, provided of course that the software is preprogrammed onto the PIC.
What The Setup Looks Like

View Full Picture