Project Info
Author: Chris
Difficulty: Medium
Time Invested: 4 Hours
Prerequisites:
Take a look at the above
articles before continuing
to read this article.
Author: Chris
Difficulty: Medium
Time Invested: 4 Hours
Prerequisites:
- ArduinoLED Intro
- PICKit3 With MPLABX
- Xbee Wireless Interface
- Arduino LCD Interface
- RS232 Serial Interface
Take a look at the above
articles before continuing
to read this article.
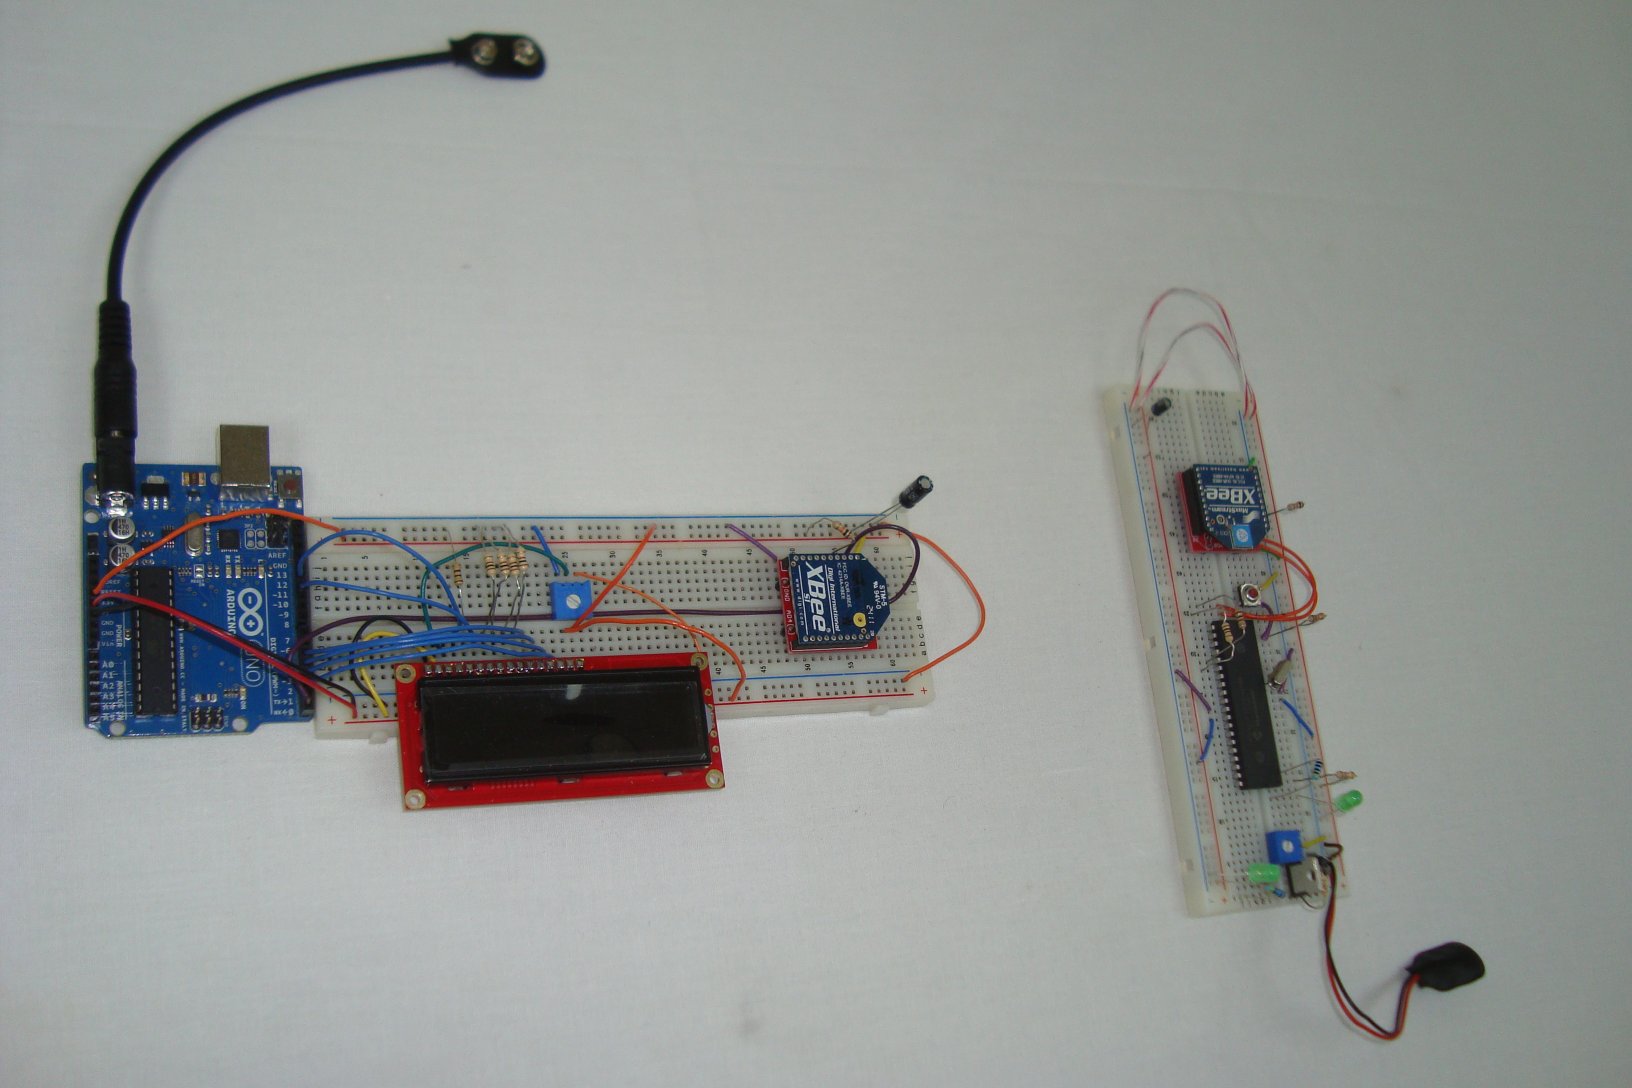
In this article, we will use a PIC 18LF4520 and an Arduino UNO to build a transmitter and receiver using some wireless modules. The PIC will output serial commands as a transmitter that tell the Arduino system to pause an LCD screen from updating a counter value. This project is intentionally designed to be simple because there are many simple ideas at play and it's important for you to understand each one.
Purpose & Overview Of This Project
The goal of this article is to explain, design and build a serial communication transmitter and receiver. The transmitter will always transmit a specific 'idle' command until a button is pressed, which will tell the transmitter to transmit an 'active' command to the receiver. The Receiver will have a 16x2 LCD display connected to it and if the 'idle' command is detected, the display will be updated with a time count value. However, if the 'active' command is received, the Receiver system will stop updating the LCD screen to signify a pause.
To build this system we will use XBee wireless modules which will transfer 9600 baud serial communication from transmitter to receiver. The transmitter will use a PIC 18LF4520, a 40 MHz crystal and a simple SPST button. The receiver will be a standard Arduino UNO with a 16x2 LCD Display connected to its digital I/O ports. Both of these designs will be built on a standard sized breadboards.