Hardware Design
Understanding how motors work is great fun, but we need to build the chassis up first before we can do anything. So let's take a few minutes and assemble the magician chassis together before we get further into playing with the DC motors.
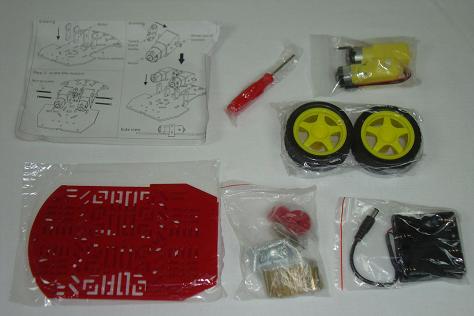
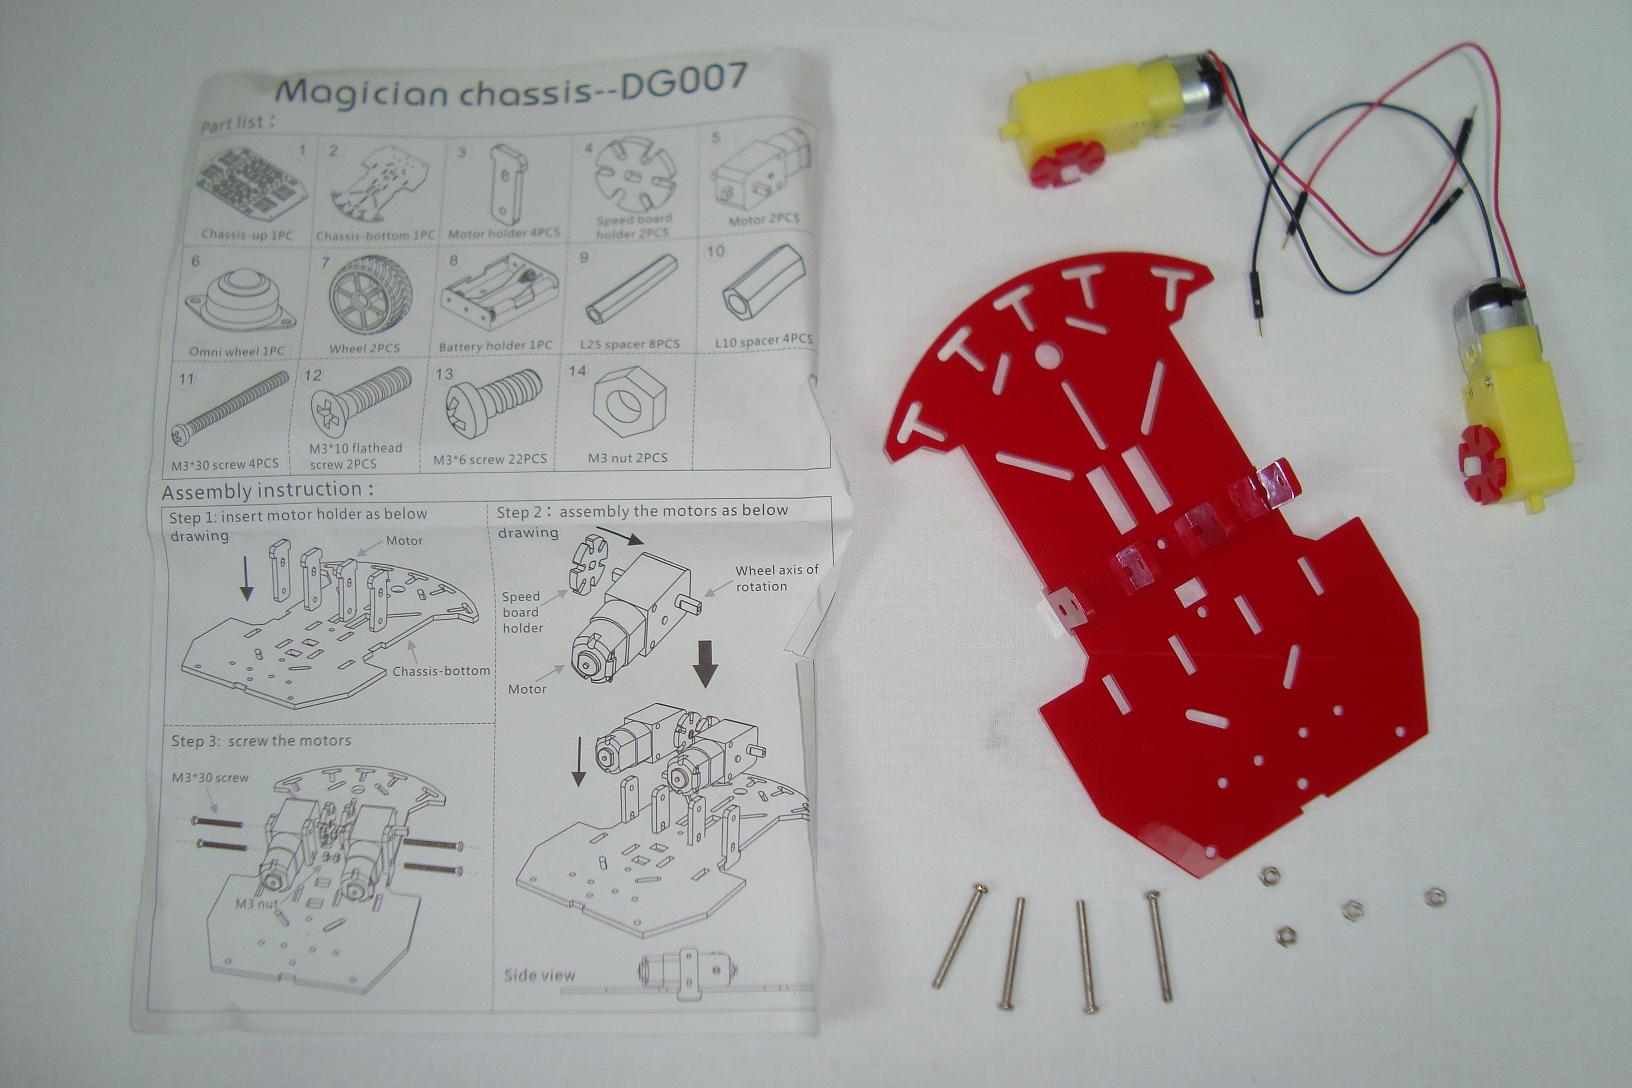
·So using all the parts seen above, we'll start assembling the chassis together. First the motor mounts are placed on the chassis.
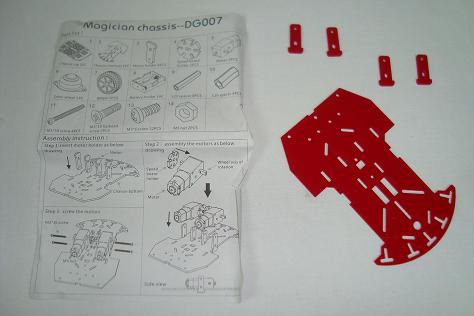
·The motors are then connected to the motor mounts securing them to the chassis using a few bolts and nuts. A small red wheel is attached to the opposite side of the motor's shaft for use with a future motor encoder.

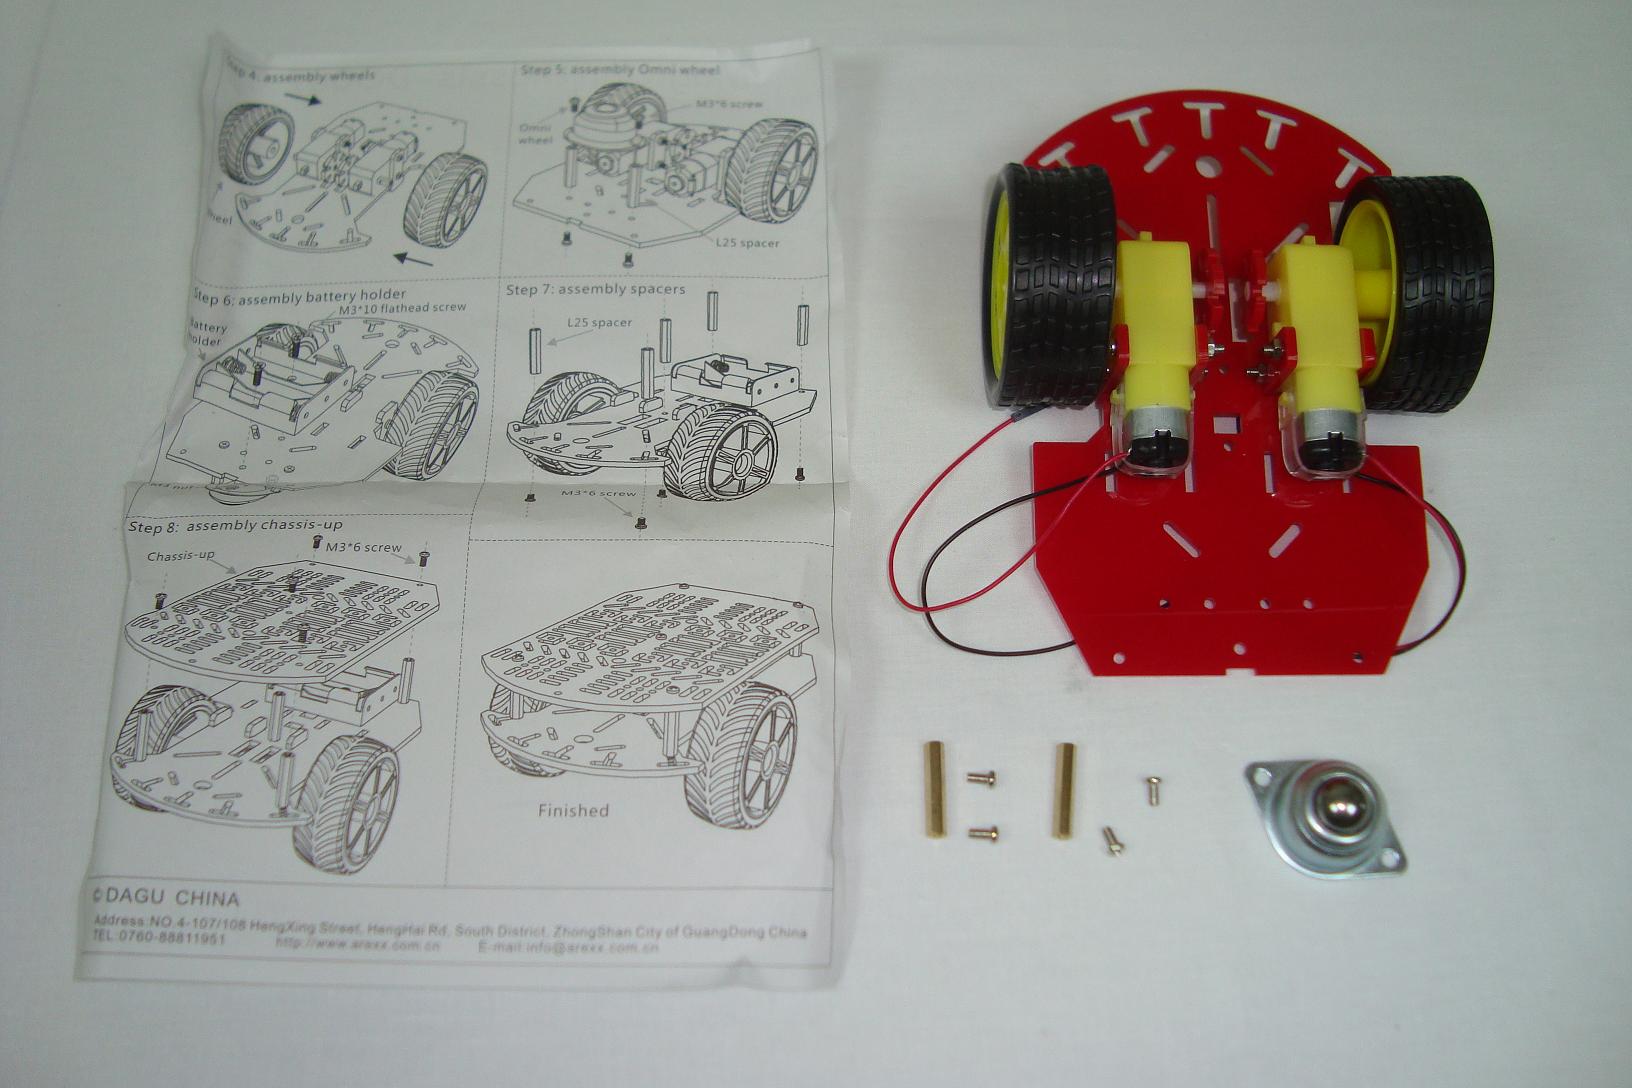
·Now we will connect the wheels on to the motor shaft. Do you best to make sure the treading on the wheels is flat and smooth, otherwise the robot may not be able to drive exactly forward easily.
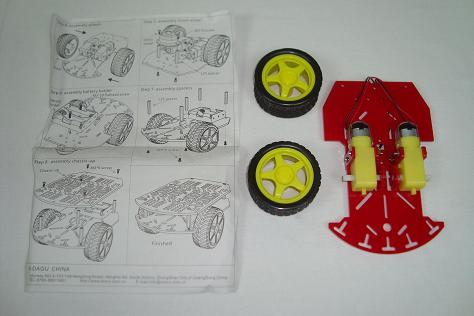
·The Uni-Ball wheel is connected to the chassis next. It is mounted with a few stand-offs and some bolts.

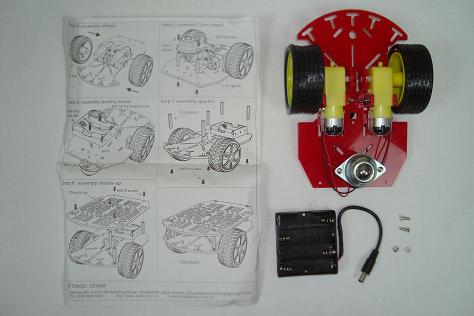
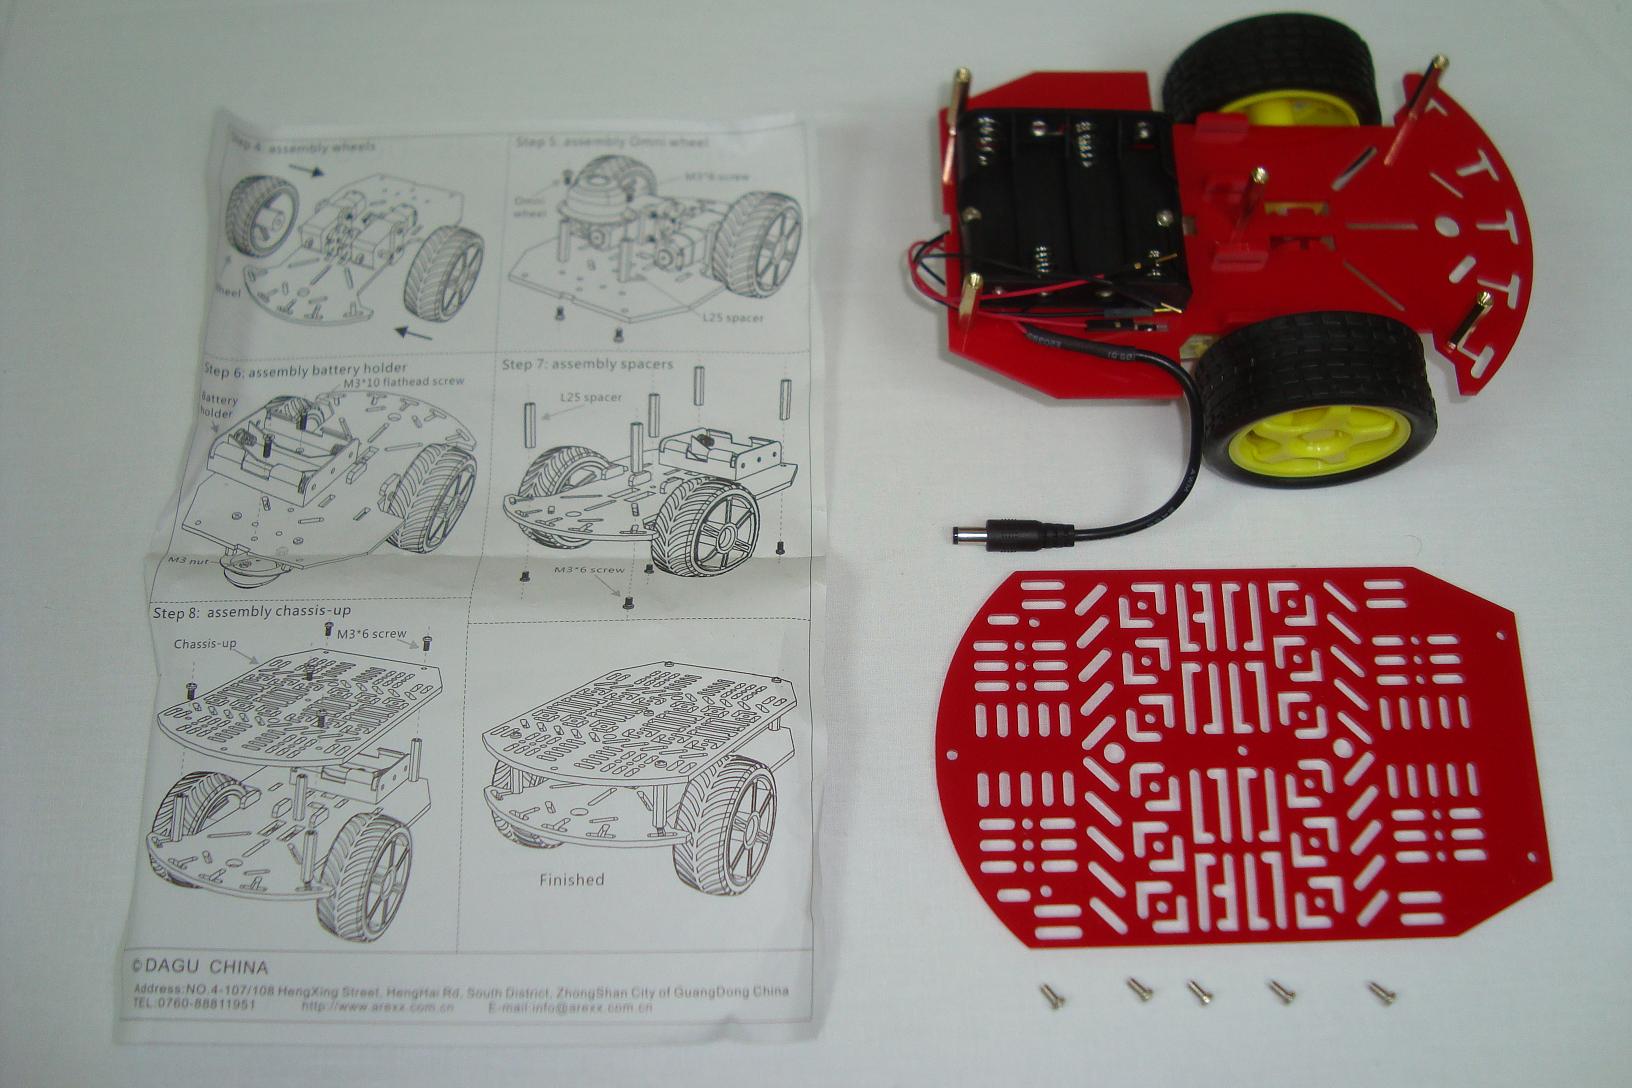
·The motors and wheels are now all connected, now let's attach the battery/power supply to the chassis.
·Next, we will add 5 stand-offs to the first level of the chassis to connect to the top level.
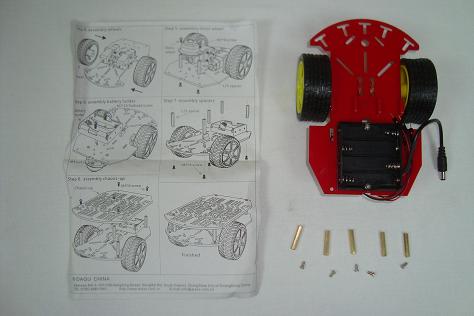
·With the stand-offs in place, we can now add the final level of the chassis, the top. A few bolts keep this top level secured to the chassis.

·Here you can see a nice close-up photo of the fully assembled magician chassis. Loose-wires and all.

·Now we need to create a platform for getting some power to our motors, so that we can test all that theory we just learned about.
Understanding how motors work is great fun, but we need to build the chassis up first before we can do anything. So let's take a few minutes and assemble the magician chassis together before we get further into playing with the DC motors.
·So using all the parts seen above, we'll start assembling the chassis together. First the motor mounts are placed on the chassis.

·The motors are then connected to the motor mounts securing them to the chassis using a few bolts and nuts. A small red wheel is attached to the opposite side of the motor's shaft for use with a future motor encoder.
·Now we will connect the wheels on to the motor shaft. Do you best to make sure the treading on the wheels is flat and smooth, otherwise the robot may not be able to drive exactly forward easily.

·The Uni-Ball wheel is connected to the chassis next. It is mounted with a few stand-offs and some bolts.
·The motors and wheels are now all connected, now let's attach the battery/power supply to the chassis.

·Next, we will add 5 stand-offs to the first level of the chassis to connect to the top level.

·With the stand-offs in place, we can now add the final level of the chassis, the top. A few bolts keep this top level secured to the chassis.
·Here you can see a nice close-up photo of the fully assembled magician chassis. Loose-wires and all.

·Now we need to create a platform for getting some power to our motors, so that we can test all that theory we just learned about.