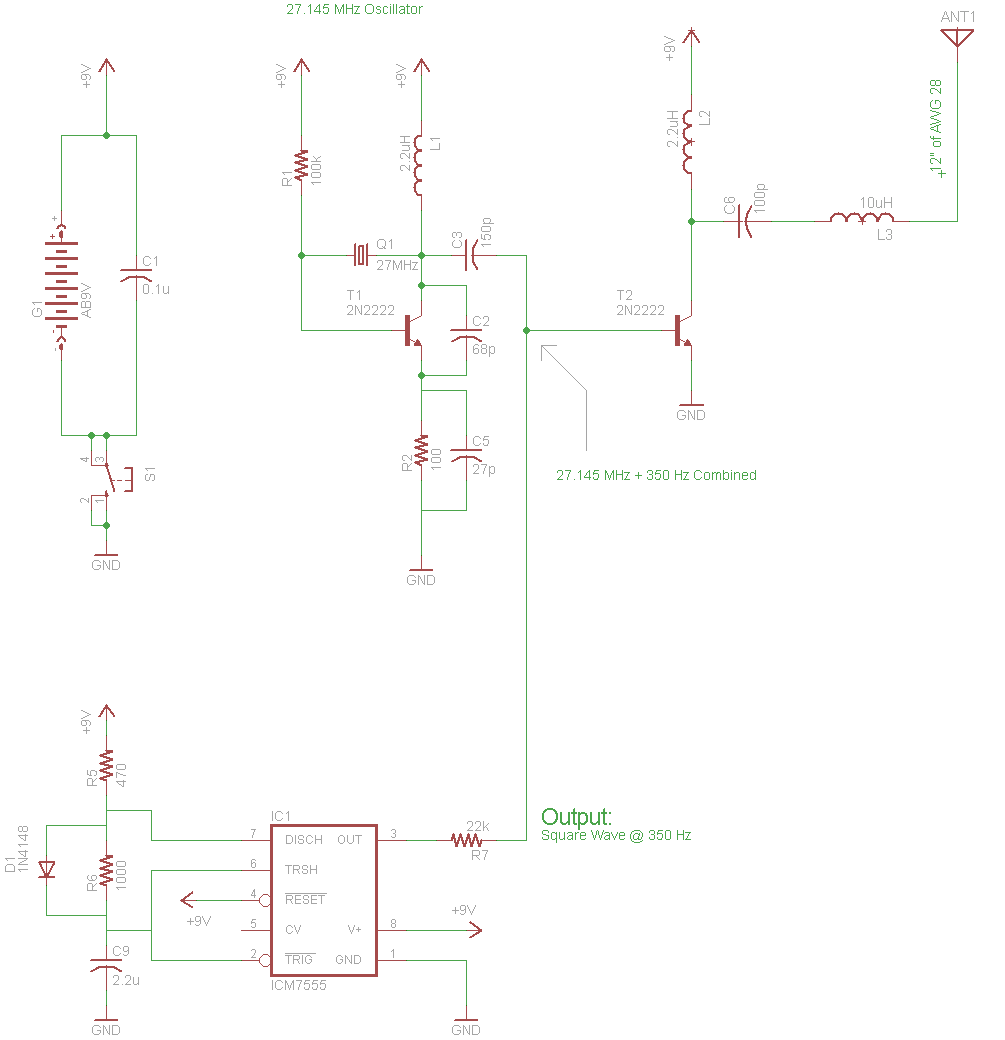
The schematic for this project is actually deceivingly simple compared to the complexity of what is happening in the circuit. So take a look below or click to view the full sized schematic.
View Full Schematic
Schematic Specifics
Exciting The Oscillator
The first transistor T1 is a configuration that excites the 27.145 MHz crystal and gets it oscillating away at its natural frequency.
Generating The 350 Hz On/Off Signal
The 555 timer is put into a configuration to generate a 350 Hz signal out of it's PIN 3 and to our transmitter circuit.
Mixing The Signals Together
The two signals we've just generated are mixed together at the base of T2 and once it goes out of the collector of the transistor our continuous wave RF transmission signal is ready.
Board Layout Overview
The board layout was done in a way so that everything was crammed together very tight. This is a difficult thing to do with through-hole parts, but not impossible.
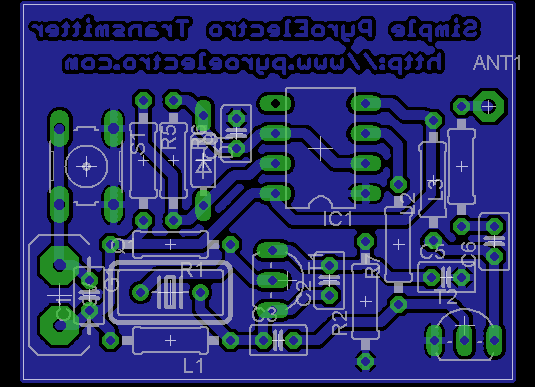
View Full Board Layout
Board Layout Specifics
Ground Plane
A ground plan covers the entire board (but is chopped up by the traces) so that all parts that need access to ground can have it easily. The ground plan is also very important as its acts as part of our antenna.
Trace Widths
I just chose a nice thick width that would transfer over nicely when building the PCB, however smaller trace widths seem to be a better choice when designing RF circuits...but at these low frequencies I don't believe there will be any performance benefit.
Shamless Logo Plug
My PC board had extra space so I plugged in PyroElectro.com. You'll notice the text is backwards, this is because during the toner transfer process, a bottom layer is technically printed out backwards, but once on the PCB it reads correctly.