Hardware Design
With the schematic and a little theory under our belts let us move on to building the circuit and the hardware. First we will build the mini-tank platform. Then we will build the circuit on the breadboard.
Mechanical Hardware
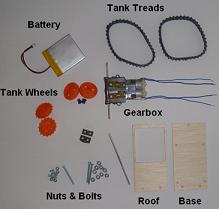
Step (1) - Gather All The Mechanical Parts »
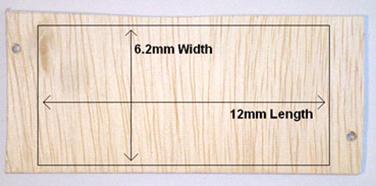
Step (2) - First you will need to cut the plywood, two 6.2mm x 12mm pieces »
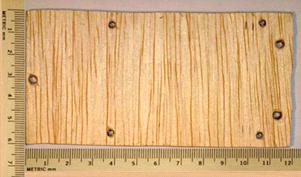
Step (3) - Drill holes into the base piece for the gearbox and tank treads »
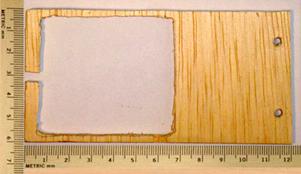
Step (4) - Cut out a 5.5mm x 6.2mm space for the battery in the roof piece »
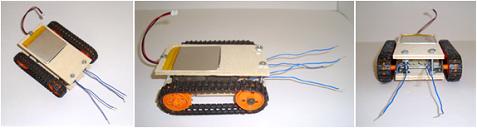
Step (5) - Finally, using nuts and bolts, assemble it together »
Electrical Hardware
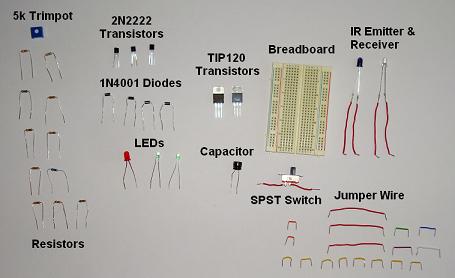
Step (1) - Gather All The Electrical Parts »
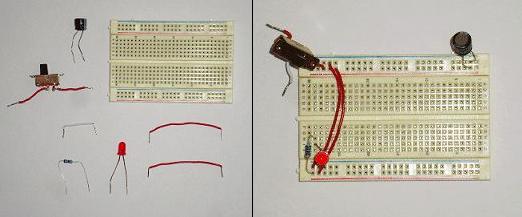
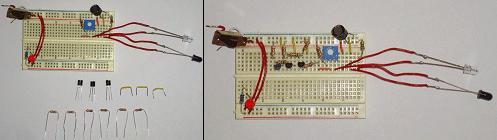
Step (2) - The first thing to build is the power circuit »
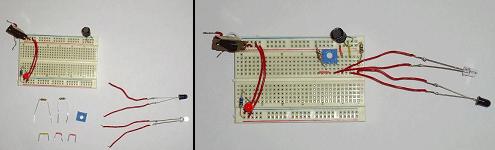
Step (3) - Next follow the schematic and assemble the IR circuit »
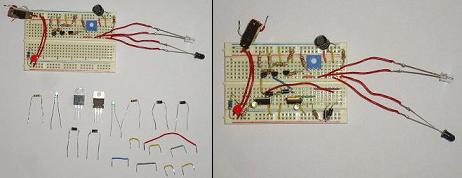
Step (4) - Now assemble together the analog brain part of the circuit »
Step (5) - Finally, assemble the motor circuit together on the breadboard »
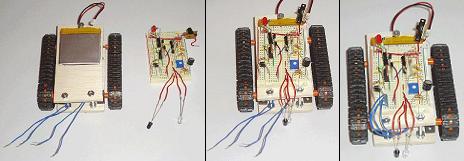
Step (6) - Mount the breadboard on the tank and plugin the motor wires »
With the schematic and a little theory under our belts let us move on to building the circuit and the hardware. First we will build the mini-tank platform. Then we will build the circuit on the breadboard.
Mechanical Hardware
Step (1) - Gather All The Mechanical Parts »
Step (2) - First you will need to cut the plywood, two 6.2mm x 12mm pieces »
Step (3) - Drill holes into the base piece for the gearbox and tank treads »
Step (4) - Cut out a 5.5mm x 6.2mm space for the battery in the roof piece »
Step (5) - Finally, using nuts and bolts, assemble it together »
Electrical Hardware
Step (1) - Gather All The Electrical Parts »
Step (2) - The first thing to build is the power circuit »
Step (3) - Next follow the schematic and assemble the IR circuit »
Step (4) - Now assemble together the analog brain part of the circuit »
Step (5) - Finally, assemble the motor circuit together on the breadboard »
Step (6) - Mount the breadboard on the tank and plugin the motor wires »