Hardware Design
The hardware design is just the cut out pieces of wood that form the base of the robotic arm & the arm itsself. It also includes the breadboarded circuit that allows the PIC control of the servos. We'll take a 'top down' look at the Wooden Menace.
The Grippers
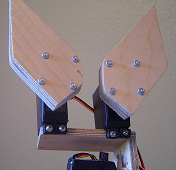
The grippers on the Wooden Menace robotic arm are attached using screws, pieces of wood cut with a jigsaw and small screw & nuts. This simple setup is surprisingly stable. The Hi-Tec 311 standard servos that are used offer enough power to grip a vast amount of objects.
The First Servo Stage
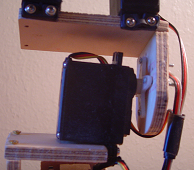
The first stage link down from the grippers has an 'L' shape to it. This link type is used twice in the gripper. The servo horn is screwed into the shorter, bottom portion of the "L" and the next servo will rest ontop (as we see the grippers do).
The Second Servo Stage
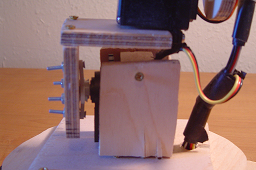
The last link of the arm has the familiar "L" shape to it and the servo connected to it is also firmly mounted to a circular platform. It is not visible but the circular platform rests on a servo which can rotate the platform & the robotic arm.
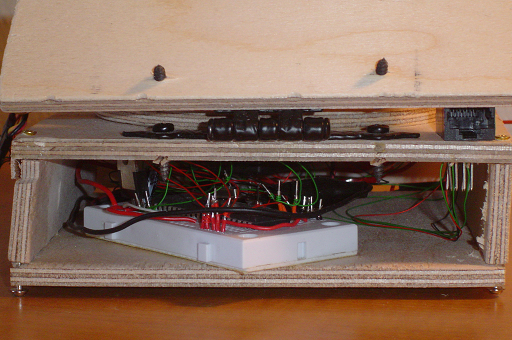
The Base
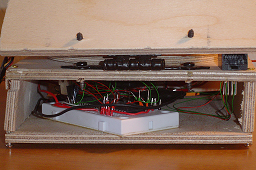
The base of the arm is just a wooden box that houses the electronics that control the robotic arm. On the right you can see the RJ45 female connector & on the left is the breadboard with everything seen on the schematic hooked up. The wiring is a combination or breadboard wire & wirewrap. It would have been a true mess of wire if wirewrap wasn't used, since no large currents were necessary wirewrap was a viable alternative.
The hardware design is just the cut out pieces of wood that form the base of the robotic arm & the arm itsself. It also includes the breadboarded circuit that allows the PIC control of the servos. We'll take a 'top down' look at the Wooden Menace.
The Grippers

The grippers on the Wooden Menace robotic arm are attached using screws, pieces of wood cut with a jigsaw and small screw & nuts. This simple setup is surprisingly stable. The Hi-Tec 311 standard servos that are used offer enough power to grip a vast amount of objects.
The First Servo Stage

The first stage link down from the grippers has an 'L' shape to it. This link type is used twice in the gripper. The servo horn is screwed into the shorter, bottom portion of the "L" and the next servo will rest ontop (as we see the grippers do).
The Second Servo Stage

The last link of the arm has the familiar "L" shape to it and the servo connected to it is also firmly mounted to a circular platform. It is not visible but the circular platform rests on a servo which can rotate the platform & the robotic arm.
The Base
The base of the arm is just a wooden box that houses the electronics that control the robotic arm. On the right you can see the RJ45 female connector & on the left is the breadboard with everything seen on the schematic hooked up. The wiring is a combination or breadboard wire & wirewrap. It would have been a true mess of wire if wirewrap wasn't used, since no large currents were necessary wirewrap was a viable alternative.